Vampire Bite Peach Cupcakes

The Southern Book Club’s Guide to Slaying Vampires by Grady Hendrix
And Peach Cupcakes, Classic Buttercream, and Peach Italian Cookies

I don’t know why humans torture ourselves with thrillers – it’s the same weird phenomenon where we stand in lines for an hour for 1 minute on a crazy tall rollercoaster. But, I excitedly seek out both. When I was younger I ate up all of Stephen King’s books but Grady Hendrix’s approach to thrillers is slightly different. I had a moment in the first 50 pages or so where I questioned if this was even a thriller at all or if it was just about housewives reading true crime books. But then it turned a corner and my heart was beating and that familiar rush of reading a thriller was there. 

The main character, Patricia, a housewife in Charleston, is pretty infuriating throughout a big chunk of the novel. You just wanted to transfer a chunk of courage to her to trust herself but she was confined and limited by classic late 80s/90s misogyny. Her husband, Carter, was the worst and her kids were annoying. Patricia largely finds solace in her book club which chooses fun and exciting thrillers and true crime novels despite how their community might judge their book choices. But like everything that she chooses for her own enjoyment, others in the book try to limit and control this joy. The humiliation that these women were forced to endure at the hands of the men is palpable. Every single family eventually has the control of the men at the center of them revealed – and Hendrix does this only after you know and love the women in the book for their strong and unique personalities. The juxtaposition here is powerful and made your hearts break for them. For the modern-day feminist, it’s more than upsetting and could be viewed as another classic novel where men are controlling things – but you need to look beyond that and consider the book in the context of the 90s and then look at the subtle character moves in the novel which makes this a modern approach. Ultimately, the sense of sisterhood in this book remains supreme. 

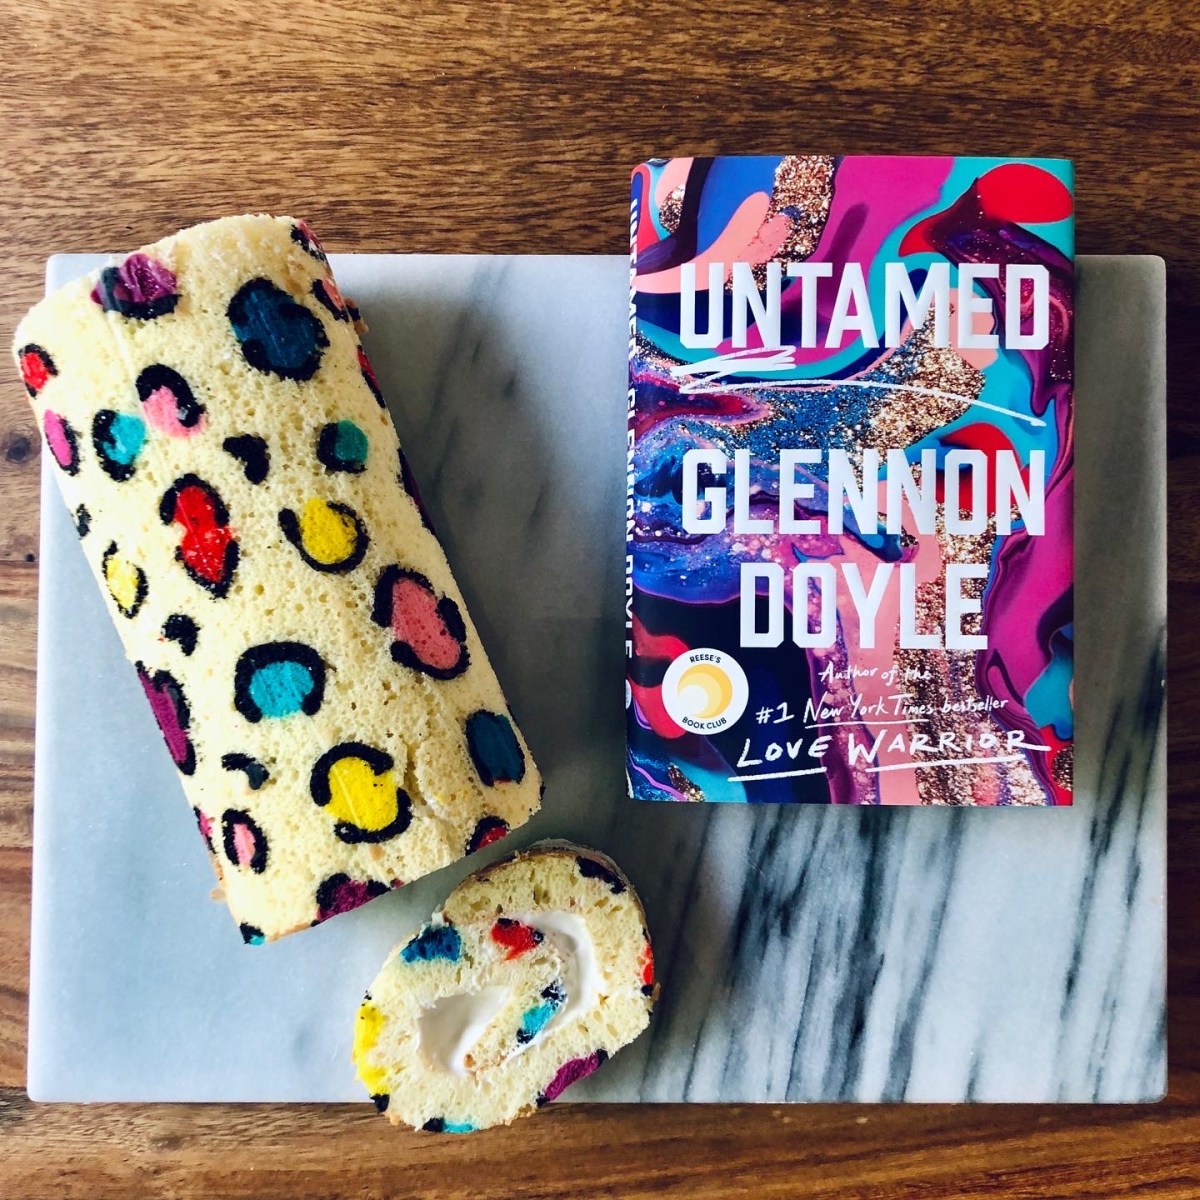
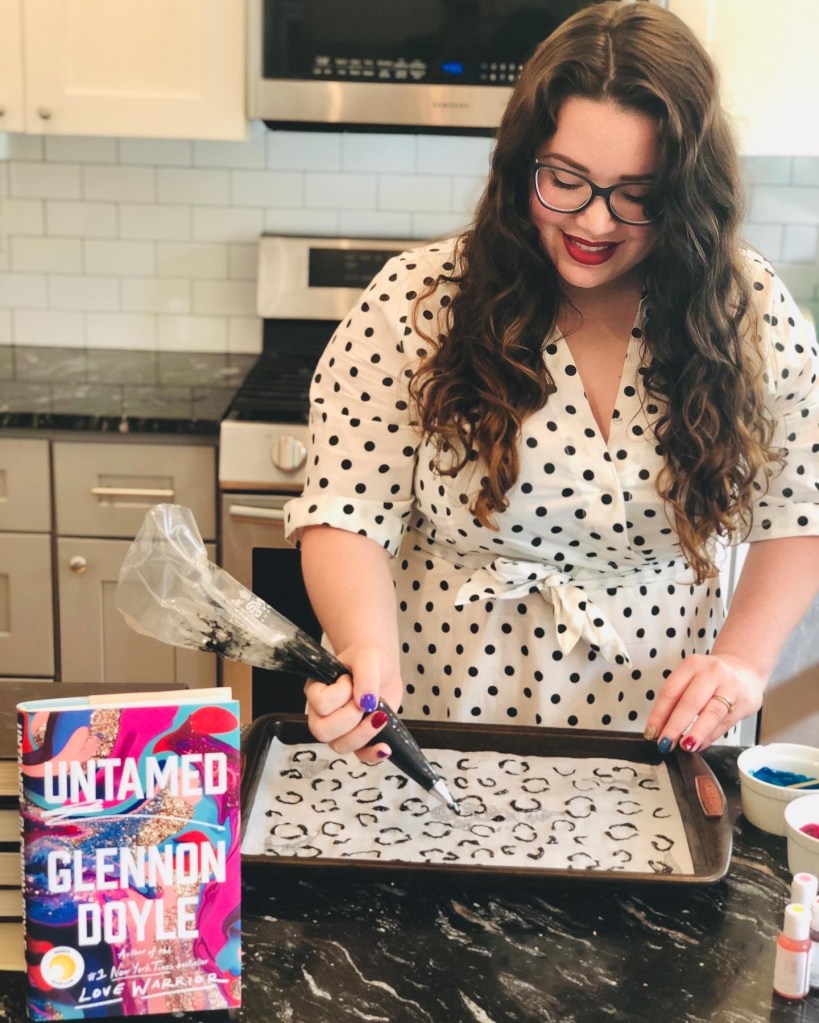
This book was particularly interesting because it snuck in a lot of commentary about race, gender roles, classism, societal pressure, and more into the most unsuspecting places. Because of these themes, even non-thriller fans can find enjoyment here. For that very reason I picked the “peach tree” scene as the representative of this book – and after you get to the scene the cover of the book begins to make sense. I can’t give away too much…but if you read on more about this inspiration get ready for the sliiightest of spoilers/implications to major plot points. 

Final Recommendation:

Skip it! /  Put it on your list! / ((Go read it now!))

Patricia ends up taking on the responsibility of caring for her senile mother-in-law. Her character seems like just a side plot and I don’t pay much attention to her at the start. As the novel progresses, her outbursts which are written off as manic episodes by the characters begin to make sense – and inform an important backstory of the vampire in the book named James. One story, in particular, stuck with me. It was when her mother-in-law told the real story behind why her peach tree on her property was considered spoiled and poisoned – and why she wouldn’t let anyone eat from it even decades later. I really don’t want to reveal much but it was a nice parallel to the “present-day” of the novel and how society seems very willing to accept easy scapegoats versus admitting personal responsibility in hard situations. It seems that the easy way out ends up destroying the characters who opt for it in the long run. 

Here is the quote that inspired the cupcakes (sort of, this is where the first seed about the peach tree storyline was planted – not where the truth behind it was revealed):

“She refused to let anyone eat from the peach tree in her backyard no matter how good the fruit looked because she said it had been planted in sadness and the fruit tasted bitter.”

Grady Hendrix, page 59

The good thing about these cupcakes is they taste anything but sad and bitter. They are goooooood and visually stunning.  I promise.

Peach Cupcakes (Makes 12):

I highly recommend watching The Scran Line’s video where he gives a tutorial on how to make these cupcakes. I didn’t make the cupcakes with his recipe but I followed his “peach” Italian cookie recipe exactly. I am always skeptical trying new cupcake recipes for cupcakes that are flavored – and tend to just make simple adjustments to my go-to vanilla cupcakes. 

Cupcake Ingredients: (makes 12 cupcakes)

  • 1 stick of unsalted butter (softened)
  • ⅔ cup of sugar
  • 1 tablespoon (packed) of orange zest (about half of an orange)
  • 3 eggs (at room temperature)
  • 1 ½  teaspoon of vanilla extract 
  • 1 ½ cups of All-Purpose Flour
  • 1 ½ teaspoon of baking powder
  • ¼ teaspoon of kosher salt
  • ¼ milk
  • 2 teaspoons of peach schnapps (or any peach liquor), optional
  • 1 cup chopped canned peaches
  • Food coloring: I used a pink gel with a touch of yellow gel.

Cupcakes How-to:

  1. Preheat oven to 350 degrees and fill your cupcake pan with liners
  2. Cream together your softened butter, sugar, and zest. When the orange zest and sugar combine it creates an awesome fruity flavor throughout the whole cupcake. Mix on medium until they are nice and fluffy. 
  3. Add your eggs, one at a time, using a rubber spatula to wipe down the sides each time. 
  4. In a separate bowl, mix together schnapps, vanilla, and milk. Set aside for a sec.
  5. In another bowl, mix together all dry ingredients (flour, baking powder, salt) and whisk to combine. 
  6. Alternate between adding your wet and dry ingredients into your sugary lemony butter mix. Mix until combined – don’t over mix! I like to do the last couple of mixes with my wooden spoon or spatula. 
  7. Put in a few drops of pink food coloring and a touch of yellow to get the nice peachy pink.
  8. Fold in your peaches.
  9. Distribute the batter evenly throughout the 12 liners – it should end up at all being 3/4ish full. Put in the oven for 17-20 minutes. 18 minutes is usually my go-to time for most cupcakes but because there’s additional liquid in here with the peaches it may take a bit longer to fully bake. The trick to knowing a cupcake is done: touch the middle of the cupcake near the end of bake time and if it bounces back, it’s done! 
  10. Allow the cupcakes to cool in the pan for 5 minutes then transfer to a wire rack to cool completely!

Frosting Ingredients:

  • 2 sticks of unsalted butter (softened)
  • 4 cups of powdered sugar
  • 1 tablespoon of vanilla
  • Optional splash of peach schnapps if you feel so moved
  • 1-2 tablespoons of heavy cream (whole milk would also be ok, heavy cream tastes best)
  • Pinch of salt

Frosting How-to:

  1. Put your softened butter in the bowl of a stand mixer on medium and beat until it is consistently creamy. This takes around 2-3 minutes. 
  2. Add the powdered’ sugar 1 cup at a time (trust me – you’ll have a mega mess on your hands if you try and put it all in at once). Mix until combined. 
  3. Add in the lemon juice, and a pinch of salt. Beat for about 2 minutes on medium speed. 
  4. Add 1-2 tablespoons of heavy cream until you get a consistency you’re happy with. Beat again for about 2 minutes. 
  5. Transfer to a piping bag and frost your cooled down cupcakes! This can also be made ahead and stored until about 1 week in the fridge. It is better to frost your cupcakes close before serving them! If you are making them ahead of time, bring them to room temperature and then beat them in your stand mixer for a minute or two until its creamy/a good consistency again! If necessary add another tablespoon of heavy cream. 

“Peach” Orange Zest Italian Cookies

Ingredients: I am giving this in US cups for measurement but head to The Scran Line for the original measurements in grams. (Full disclosure, I have a scale so used the original grams but just carefully watched the cup measurements for you all!)

  • 5 cups of flour
  • 1 tablespoon of baking powder
  • 3 eggs
  • 1 cup of granulated sugar minus about two tablespoons (it should be a little less than 1 cup).
  • 185 ml of whole milk (this is about 6 ounces or a fifth less than a cup)
  • 2 sticks of unsalted butter, melted and cooled a bit
  • Freshly grated zest of 1 orange
  • 1/2 cup Peach Schnapps + 4 drops red food gel (adjust based on how light your alcohol is)
  • 1/3 cup of rum (I used dark rum) + 3 drops of yellow
  • About 1 cup of sugar for coating
  • Mint leaves (fresh) to garnish as the leaves

How-to:

  1. Preheat oven to 350 degrees.
  2. Sift your flour and baking powder into a big bowl. Whisk together. 
  3. In another, small bowl whisk your eggs together then whisk together with your sugar. Next, add in your milk to this same bowl and continue to whisk. Lastly, add in your cooled off melted butter and mix to combine. 
  4. Zest your orange over this liquid ingredient bowl and mix to combine.
  5. Mix into the dry ingredients and mix with a wooden spoon and spatula to combine.
  6. Let the dough rest for about 5 minutes. 
  7. The batter should be thick enough to form little tablespoon-sized balls. Roll it in your hand and then place on a greased cookie sheet/or one fitted with parchment paper. These only expand a little and will keep their shape and light color after being baked. 
  8. Bake them for 15 minutes (bottoms should be slightly golden brown).
  9. While it’s baking – make your ganache (recipe below)!
  10. Hollow out a small hole in the bottom of each cookie, slather lightly with ganache, and attach bottom to bottom to form your peach. The ganache acts as your “glue”. I put these in the refrigerator for about five minutes for them to harden.
  11. Allow them to cool while you mix together your food coloring station: take out three bowls similar to how you would arrange a breading station for breaded chicken. In one bowl mix your rum and coloring, in another your schnapps and coloring, and lastly your sugar.
  12. Take the cookies, dip small sections in the red mixture, roll it completely in the yellow mixture and then coat it in sugar. 
  13. Then put a nice mint leaf on top and you’ve got a tasty peach! 

Ganache to join the cookies together:

**Note on chocolate ganache: basically your ratio of chocolate to cream is what dictates the thickness. For this, I used a 2:1 ratio which is similar to what you can use to make chocolate truffles. 

  • 1 cup of semi-sweet or dark chocolate chips
  • ½ cup of heavy whipping cream

How-To:

  1. Combine the two ingredients in a microwave-safe bowl. Gently stir. 
  2. Microwave in 20-second intervals, mixing after each time. Be patient! It eventually comes together. 
  3. Let cool a bit.

Vampire Blood:

  • Corn Syrup (both light and dark)
  • Red food coloring

To get the vampire blood I mixed corn syrup and red food coloring. I used a mixture of light and dark corn syrup to get a true blood color (I used much less of the dark) and sort of eye-balled the food coloring until I got a color I liked. I then punctured the cookie with a toothpick and used the toothpick to drip the “blood” mixture down into the bites. 

Untamed’s “Goddamn Cheetah” Swiss Roll Cake

Untamed by Glennon Doyle
And a Cheetah Swiss Roll Cake

Let me start off with a disclaimer on this one: I “get” this book but something about it didn’t affect me in the way I think it was intended to. I’m very pro the main message of this memoir: that society teaches and forces women to conform and to ignore their inner desires and call it martyrdom or call it “being a good/proper woman.” I also believe that women should “sink” into themselves more and listen to their intuition, or their “knowing” as Doyle calls it. Maybe it was the style of writing that I didn’t connect to or the repetition of the same message throughout the book but it didn’t register as anything revolutionary or new. Maybe, perhaps, it was my years in Barnard College as an undergrad or my hyper independent mother being my guide through life but I felt like I’ve already received these messages in a way that’s resonated for me in a more meaningful sense. It’s just a story. And it’s uniquely her story, and that’s ok. 

I think a lot of women, especially those struggling with any addictions, feeling unfulfilled in their lives, questioning their parenting methods, feeling the pressure of gender roles, or feeling confined in their marriages, would benefit from reading her story. This feeling of discontent and the moment that a young women’s light is dulled is all too real, and something many women will read and nod their heads in agreement to. Mhmmm, yes, we’ve been there. If this story calls to you, please read it!

Final Recommendation:

Skip it!  /  ((Put it on your list!))  / Go read it now!

Despite this book and I not exactly vibing, I love that Doyle found love and is finally living her truth. I especially liked the prologue of the book and think the metaphor of women being like cheetahs in captivity is a good way to set the scene for this book’s message. So, I decided that the best food to capture this book is a cheetah Swiss roll, which proudly wears its spots on the outside. It is a bold cake but is actually rather easy to make. It has a similar wow factor to the cover art of this book!

Quote that inspired the recipe:

“I understand myself differently now. I was just a caged girl made for wide-open skies. I wasn’t crazy. I was a goddamn cheetah,” (5).

Glennon Doyle

A Goddamn Cheetah Swiss Roll Cake
Adapted from Kimberlycstar.com

Swiss Roll Ingredients:

  • 1 box of white cake mix
  • 6 large eggs
  • 1/4 cup sour cream
  • 1/4 cup water
  • 1/4 cup canola oil
  • Colored gel food coloring (I used pink, red, purple, blue and yellow)
  • 1 black gel food coloring

Swiss Roll How-to:

  1. *I don’t preheat my oven for this one until I step 6 but if you’re faster than me, preheat it to 350.*
  2. Crack your six large eggs into the bowl of your mixer. Beat them on medium for about 6 minutes so they become very well combined and very yellow.
  3. While your eggs are being beaten (lol), measure out your parchment paper to cover the entire bottom of an edged cookie sheet. I used a little spray of canola oil in each corner to make the parchment paper stick to the sheet flat. 
  4. SIFT your cake mix into the egg mixture. This is a CRITICAL MOVE (sorry for screaming) when using boxed cake because the lumps in it will not come out and will lead you to overbeat your batter or having little pockets of unmixed powder (ew). 
  5. Add in the sour cream, water, and canola oil. Beat for about 1 minute. If necessary, give it a few more mixes with a spatula or wooden spoon. 
  6. Take out about six small bowls (depending on the number of colors you want to use. Focus on the black batter first. You will need ½ cup for your black batter (mix about 2-3 drops of black gel coloring in it). Once you get the color you like, scoop the batter into a piping bag. I used the Wilton 4 tip with this. You could also use a plastic squeeze bottle if you prefer.
  7. Preheat your oven 🙂
  8. Create your black cheetah lines first. I looked at an online picture of cheetah stripes for a while and then just freehanded the same 3-4 designs all over. Put this into the fridge while you mix your colored batter. (Putting it in the fridge helps the pretty design you just made not get smushed or spread).
  9. Take about two tablespoons of plain batter for each of the colors. Mixx them in separate bowls. Take out the refrigerated sheet and use a toothpick to grab the batter and color in the dots on your cheetah print. (You could also use individual piping bags for this but that felt like a waste.) When you’re done, put this in the fridge for at least five minutes.   
  10. Scoop the plain batter into a piping bag (I did not use a tip) and cover the entire cookie sheet. Patch up any holes carefully and lightly with a rubber spatula. 
  11. Bake for 9-12 minutes. Again the test for “doneness” is touching the top and it bouncing back up to you. Then move quickly to the next step! We need the cake HOT for it to keep its form and not crack.
     

How to roll a swiss roll cake:

  1. Let your cake cool for about 2 minutes and take a piece of parchment paper about the size of your cookie sheet and sprinkle powdered sugar lightly over it. Get a clean kitchen towel ready.
  2. Tightly place the kitchen towel over the cake and invert it, allowing the cake to fall (very gently) onto the towel. Your cake will be facing the wrong way. Gently (VERY GENTLY) flip it over with the help of your towel and a guiding hand onto the prepared parchment paper. It should now be cheetah print side DOWN on the parchment.
  3. Arrange the cake so it is short side of the rectangle to you. Score a line with a knife about five inches from the edge of the cake, being careful not to cut through to the bottom. 
  4. Take the edge of the parchment paper and drape it over to your scored line. Roll the cake up tightly but gently with your parchment paper. Allow the cake to completely cool (about 1 hour) in this position. I sandwiched it between two bowls so it wouldn’t flatten. 
  5. Once cooled, carefully unroll and frost the inside of the cake. 
  6. Re-roll without the parchment paper this time and let set in the refrigerator for 2 hours to overnight. This is BEST when it has the time to set overnight.

Frosting Ingredients:

  • 2 sticks of unsalted butter (softened)
  • 4 cups of powdered sugar
  • 1-2 tablespoons of heavy cream (whole milk would also be ok, heavy cream tastes best)
  • Pinch of salt
  • 1 teaspoon of vanilla extract
  • 1 cup of heavy cream

Frosting How-to:

  1. Put your softened butter in the bowl of a stand mixer on medium and beat until it is consistently creamy. This takes around 2-3 minutes. 
  2. Add the powdered’ sugar 1 cup at a time (trust me – you’ll have a mega mess on your hands if you try and put it all in at once). Once all combined, beat for about 2 minutes.
  3. Add the vanilla extract and then the 1-2 tablespoons of heavy cream (until you get a consistency you’re happy with). Beat again for about 2 minutes. 
  4. In a totally separate bowl (!!) put your 1 cup of heavy cream (and optional 2 tablespoons of sugar but I left this out) use the whisk attachment to your mixer to whip up this cream into…well….whipped cream. Beat it medium-high until it has stiff peaks. 
  5. Take your whipped cream and fold it into your vanilla frosting – and voila! 

Circe’s Gold Lemon Cupcakes with Cookie Pigs

Circe by Madeline Miller
And Lemon Gold Cupcakes with Pig German Butter Cookies

I am a sucker for anything cosplay-able. When my friends announced that our next annual dress-up/theater event would be Greek Mythology themed I could not contain my excitement and decided to read all the Greek Mythology I could get my hands on. I am not playing the role of Circe, but I was drawn to this book because of the story Circe represents: classically misunderstood woman whose strength and beauty is doubted but who is crazy powerful and worthy. I spent a decent majority of the reading time with my inner monologue screaming, “Nooo Circe! Don’t let them play you like this! You’re a powerful witch, girl!!!” I think, by the end of the book, she heard me. 

Circe grows more powerful and self-determined as the story progresses. When she turns her first batch of fellas into pigs I nearly threw the book down to cheer – let me tell you, they deserved it! If you read the Odyssey in your 9th grade English class, like me, then you are only familiar with a very different version of Circe – where she is weak and grovels at Odysseus’s feet. It was nice to have her story and strength reclaimed by Miller in this novel. Additionally, in the spirit of Mother’s Day this weekend, Circe was a fierce single mother who did everything in her power to protect and love her son. It is equal parts: epic adventure, affirming powerful women, witchery and magic, and romance. Super like!

Final Recommendation:

Skip it! /  Put it on your list!  / ((Go read it now!))

Circe’s exile on the island Aiaia, although making her lonely at first, only gives her space and freedom to improve on her witchcraft. I wanted to make a cupcake and cookie that was an homage to her beauty (no matter how many called her “ugly” or her voice “thin” and annoying because she had the voice of a mortal and didn’t glow like her siblings). As the daughter of Helios and a naiad (a sort of water guardian – daughter of titan Oceanos), it was assumed that Circe would come out a golden goddess as her siblings had. She didn’t – but that doesn’t mean she wasn’t fierce and it took her getting away from her family and the cruel judgment they bore upon her for her to discover this. Thus, we have a fragrant lemon cupcake colored gold and some pig-shaped butter cookies as a testament to her power (and isn’t power better than fleeting and subjective standards of beauty anyways?!).

Quotes that inspired the recipe:

“The air felt limned in gold around me. ‘Come,’ I said. I strode down the hall and out to the sty. Its gate swung wide at my touch. The pig squealed, but when they saw him behind me their terror eased. I brushed each snout with oil and spoke a charm.”

“It is a common saying that women are delicate creatures–flowers, eggs, anything that may be crushed in a moment’s carelessness. If I ever believed it, I no longer did.”

Lemon Cupcakes with Lemon Buttercream Frosting (makes 12 cupcakes)
For this cupcake, I used my classic Vanilla Cupcake recipe and just added lemon zest/juice to it. Feel free to omit the lemon for vanilla only! This cupcake is a great base for a lot of different flavor experimentation.

Cupcake Ingredients:

  • 1 stick of unsalted butter (softened)
  • ⅔ cup sugar
  • 2 tablespoon (packed) of lemon zest (zest 2 lemons fresh!)
  • 3 eggs (at room temperature)
  • 1  teaspoon of vanilla extract (when I do just vanilla I use 1 and ½)
  • 1 ½ cups of All-Purpose Flour
  • 1 ½ teaspoon of baking powder
  • ¼ teaspoon of kosher salt
  • ¼ milk
  • Fresh juice of the two lemons you zested!

How-To:

  1. Preheat oven to 350 degrees and fill your cupcake pan with liners
  2. Cream together your softened butter, sugar, and zest. When the lemon zest and sugar combine it creates an awesome lemony flavor throughout the whole cupcake. Mix on medium until they are nice and fluffy. 
  3. Add your eggs, one at a time, using a rubber spatula to wipe down the sides each time. 
  4. In a separate bowl, mix together lemon juice, vanilla, and milk. Set aside for a sec.
  5. In another bowl, mix together all dry ingredients (flour, baking powder, salt) and whisk to combine. 
  6. Alternate between adding your wet and dry ingredients into your sugary lemony butter mix. Mix until combined – don’t over mix! I like to do the last couple of mixes with my wooden spoon or spatula. 
  7. Distribute the batter evenly throughout the 12 liners – it should end up at all being 3/4ish full. Put in the oven for 17-20 minutes. 18 minutes is usually my go-to time for most cupcakes. The trick to knowing a cupcake is done: touch the middle of the cupcake near the end of bake time and if it bounces back, it’s done! 
  8. Allow the cupcakes to cool in the pan for 5 minutes then transfer to a wire rack to cool completely!
  9. Optional filling for these cupcakes: they’d be so yum with a lemon curd filling.

Frosting Ingredients:

  • 2 sticks of unsalted butter (softened)
  • 4 cups of powdered sugar
  • 2 teaspoons of lemon zest (from about half a lemon)
  • 2 tablespoons of lemon juice
  • 1-2 tablespoons of heavy cream (whole milk would also be ok, heavy cream tastes best)
  • Pinch of salt

How-To:

  1. Put your softened butter in the bowl of a stand mixer on medium and beat until it is consistently creamy. This takes around 2-3 minutes. 
  2. Add the powdered’ sugar 1 cup at a time (trust me – you’ll have a mega mess on your hands if you try and put it all in at once). Mix until combined. 
  3. Add in the lemon juice, a pinch of salt, and lemon zest. Beat for about 2 minutes on medium speed. 
  4. Add 1-2 tablespoons of heavy cream until you get a consistency you’re happy with. Beat again for about 2 minutes. 
  5. Transfer to a piping bag and frost your cooled down cupcakes! This can also be made ahead and stored until about 1 week in the fridge. It is better to frost your cupcakes close before serving them! If you are making them ahead of time, bring them to room temperature and then beat them in your stand mixer for a minute or two until its creamy/a good consistency again! If necessary add another tablespoon of heavy cream.
  6. Make them gold by mixing a tablespoon of clear vanilla extract and some edible gold dust. Then you sort of paint it on. So fun and so shiny! You can also buy gold spray for the same effect but it’s less tasty.

*Note on the pig cookies. I hated making them. I made a mistake, knew the mistake I made, but didn’t have the ingredients to start over. When I finished them I handed them to my husband and said, “Here! Take them! Take them out of my sight!” Don’t be like me – read the instructions carefully! 😀

Pig German Butter Cookies
Recipe from craftpassion.com/piggy-german-butter-cookie/

Special Equipment: A scale or use an online converter! However, my scale is one of my favorite baking tools!

Ingredients: (makes about 48 pigs depending on how large you make them)

  • 125 grams of Unsalted Butter (NOTE: This should be VERY softened – not just room temperature — like almost melted but still holding it’s shape)
  • 50 grams of Powdered Sugar
  • 95 grams of Potato Flour
  • 120 grams of All-Purpose Flour (sieved)
  • 10 grams of Full Cream Milk Powder
  • Pinch of salt
  • Pink Food coloring
  • Black Sesame Seeds (I used melted chocolate and a toothpick because I couldn’t find black sesame seeds)

How-To:

  1. Can you tell from my ingredient list where my mistake was? Yep. It was the butter. Make sure it is softened as your first step or else your batter will be very sandy and will crumble in your hands. I nearly had a meltdown, but butter is always a crucial ingredient in baking and can not often be fixed after other ingredients are mixed with it. Consider this your warning! 
  2. Preheat oven to 300 degrees. 
  3. Cream your SOFTENED (ok, I think you get the point now) butter and powdered sugar for about 1-2 minutes in your mixer until fluffy. 
  4. Fold in (with a wooden spoon or rubber spatula) your AP flour, potato flour, milk powder, and salt. Mix until it comes together into a soft dough. 
  5. Remove 2 tablespoons of dough and mix with pink food coloring. You can wear decorator’s gloves for this step or put the dough in some cling wrap and mix it through that – or you can just do it with your hands and live with the stains like I did. Up to you! 
  6. To make the face of the pic, roll a small ball of about 8 grams out of the plain colored dough. Then roll three small balls out of the pink dough and pinch 2 of them into a triangle shape for the ears and 1 into an oval shape for the nose. Arrange the ears on top of your plain dough ball, pressing lightly so they’ll stick. Use a toothpick to pierce the nose hols in the oval snout. 
  7. If you have black sesame seeds, press them lightly in now. If not, bake them without eyes and wait until they are cooled to dot them with melted chocolate eyes. 
  8. Bake them in the oven for about 20 minutes. 
  9. Cool for 5 minutes then transfer to a cooling rack. 

Dumbledore’s Lemon Drop Squares

Harry Potter & The Sorcerer’s Stone by J.K. Rowling 
And Lemon Drop Squares 

Ok, I know that I have committed an English teacher crime by reading Harry Potter for the first time in my adulthood – but here we are. I am not sure why I didn’t read Harry Potter as a child, especially since it completely consumed my generation. Maybe it was my rebellious nature and desire to go against the grain as a little angsty hormonal middle schooler? Who knows. As a kid I read the first chapter only, then I watched the movie and was upset that Dumbledore’s lemon drop scene didn’t make the cut as he dropped Harry off on the Dursley’s doorstep. What a little film critic I was. 

As an adult, I absolutely loved the first book and am kicking myself for not reading it sooner. It truly is a work of literary genius – it develops and creates an entire world but does it so carefully, where you get 100 pages down and realize a clue had been dropped on page 5 for a character you’ve finally formally met. Just so good. Books also just have the ability to slow-develop characters in a way that movies don’t have the time for. For example, we had much more time with the Dursley’s in the beginning of the book and therefore developed a much more passionate dislike for them. I was also much more impressed with Harry’s strength of character in the book form versus the movie (although I love the movies too). We saw much more of an active struggle getting to read his thoughts and how he balanced out the pros and cons of situations. And Dumbledore is an absolutely lovable and cooky character! How I wish his flower bonnet for the Christmas dinner made it in the movie because the image had me giggling. It’s inspiring to see such a powerful, successful, and wise figure have such a joy for life. 

Obviously rating this book feels silly, but if you’re like me and haven’t read it yet end the shame now and get to it!

Final Recommendation:

Skip it! /  Put it on your list! / ((Go read it now!))

I wanted to make a dessert that honored  Dumbledore’s love of Muggle lemon drops. I love that he carries around and appreciates a Muggle candy – this is the first character move we really see him make that sets the stage for his humility and humor despite being a powerful wizard. 

The quote that inspired the recipe:
“We have much to be thankful for. Would you care for a lemon drop?”
“A what?
“A lemon drop. They’re a kind of Muggle sweet I’m rather fond of.”
No, thank you,” said Professor McGonagall coldly, as though she didn’t think this was the moment for lemon drops.”

Dumbledore’s Lemon Drop Squares
Adapted from Serious Eats

Ingredients: 
For the Crust:

  • 1 cup AP Flour
  • ½ cup Powder
  • ¼  teaspoon salt
  • 1 tablespoon of zest (needs to be freshly grated or else dries out)
  • 1 stick of cold unsalted butter, cut into ¼ inch dices

For the Custard:

  • 3 large eggs, cold
  • ½ cup/135 grams  egg yokes (this was from about 6 eggs for me but Serious eats says 8 eggs. It’s helpful to have a scale for this one)
  • 1 ⅓ Granulated Sugar
  • Pinch of salt (kosher is the best for baking)
  • 1 packed tablespoon of lemon zest (this came from one large lemon for me)
  • 1 ⅓ cups of lemon juice (this came from 7 lemons for me but you could need 8-9 depending on how juicy your lemons are!)

Topping:

  • ½ cup powdered sugar
  • Small sheet of wax paper to make your lightning bolts

*Note: These turned out to be a bit too sour for my taste but had a lovely color and texture. I liked the taste because they were very similar to a lemon drop candy. I would make some fresh whipped cream on the side to cut the flavor and it would be perfectly balanced!

How-To:

  1. The Crust: Your first step is to make the crust for these bars. This is a fairly simple process and most of the work is done by your food processor. Preheat your oven to 350! 
  2. Line your 8×8 pan (Serious eats suggests anodized-aluminum, but I only had glass so I watched the crust more closely and took it out earlier.) Hang two pieces of parchment paper over the pan (these should cover the whole bottom of the pan and hang over all four sides). 
  3. Combine all of your crust ingredients into your food processor. Pulse the ingredients until they start to combine. If it’s sandy, keep pulsing! It will start to form into bigger pebbles. 
  4. Put this into your prepared pan and press it firmly into the pan to form a smooth even layer. 
  5. Bake about 30 minutes (less if you don’t have an aluminum pan) Keep an eye on it and pull it out of the oven when it’s light gold and firm to the touch.
  6. The great thing about this crust is you can make it early and store it up to 48 hours (tightly covered/room temperature) I made it earlier in the day, ran some errands, and used it a few hours later when my custard was ready. You can also use it hot/fresh out of the oven! 🙂
  7. If you are using right away, keep your oven on and heated to 350!
  8. The Custard: In a large saucepan, whisk together your whole eggs, yolks, granulated sugar, salt, and lemon zest until combined. After this is well-combined, whisk in your lemon juice. Cook this over low heat for around 3 minutes gentle stirring it. Test it with your finger to see if it’s warm. 
  9. Increase your heat to medium-low and continue to stir (I switched from my whisk to my wooden spoon here because the sauce will thicken). Use a thermometer and turn off your heat when it gets to 170 degrees. This took me about 6 minutes but can take up to 8. 
  10. Make sure your crust is nearby because once this is done you’ll immediately strain it(using a fine mesh strainer) on top of your crust. Smooth it out gently if necessary.
  11.  Cover your pan with aluminum foil. Bake your bars until firm. This took mine about 12 minutes but check on it after 9 minutes. 
  12. Take out of the oven and take OFF the foil. Bring the pan to room temperature. If you keep the foil on it will trap the heat, still cook a bit, and you’ll get a build-up of condensation. 
  13. When it is cooled down, replace the foil and put it in the fridge for at least an hour.
  14. The Topping: Loosen the sides of your bars with a butter knife where necessary. Hold on to the parchment paper and pull gently up and transfer it whole to a cutting board. 
  15. Cut into squares of whatever size you wish. I also trimmed a bit of the side to it looked more uniform. 
  16. Trace out a lightning bolt on some wax paper (or parchment!) and cut out your stencils. Place them on the squares ensuring that a teeny bit of the stencil still hangs off. 
  17. Use your cleaned fine mesh and put your powdered sugar in it. Gently hit the sides of your mesh strainer over your bars to shower powdered sugar on them. 
  18. Use a toothpick or a tweezer to lift up your wax thunderbolts when you’re done!