Wow. What a wild ride my first three weeks have been on this blog and on my instagram. On Friday I had around 300 followers and today I am at over 600. I am so thankful and excited to have so many following along on my reading and baking journey! The “bookstagram” community is one that I knew very little about before this year and now I feel so welcomed into a dope and supportive group of wonderful humans.
I started this page to combine two major passions of mine. I’m a full time high school English teacher and am currently attending graduate school for my (second) master’s degree in Educational Leadership. So, I never thought I’d have the time to truly dedicate to a blog and instagram page like this to truly be “proud” of it – or whatever other superficial pressure I decided to put on myself. With the quarantine in New York State and my busy city coming to a stand still I decided to say, “What the heck?!” and went for it. When things get hectic now, or when I feel down, I am finding the happiness here and in really honoring the things that make me happy. It’s been a pretty powerful experience so far.
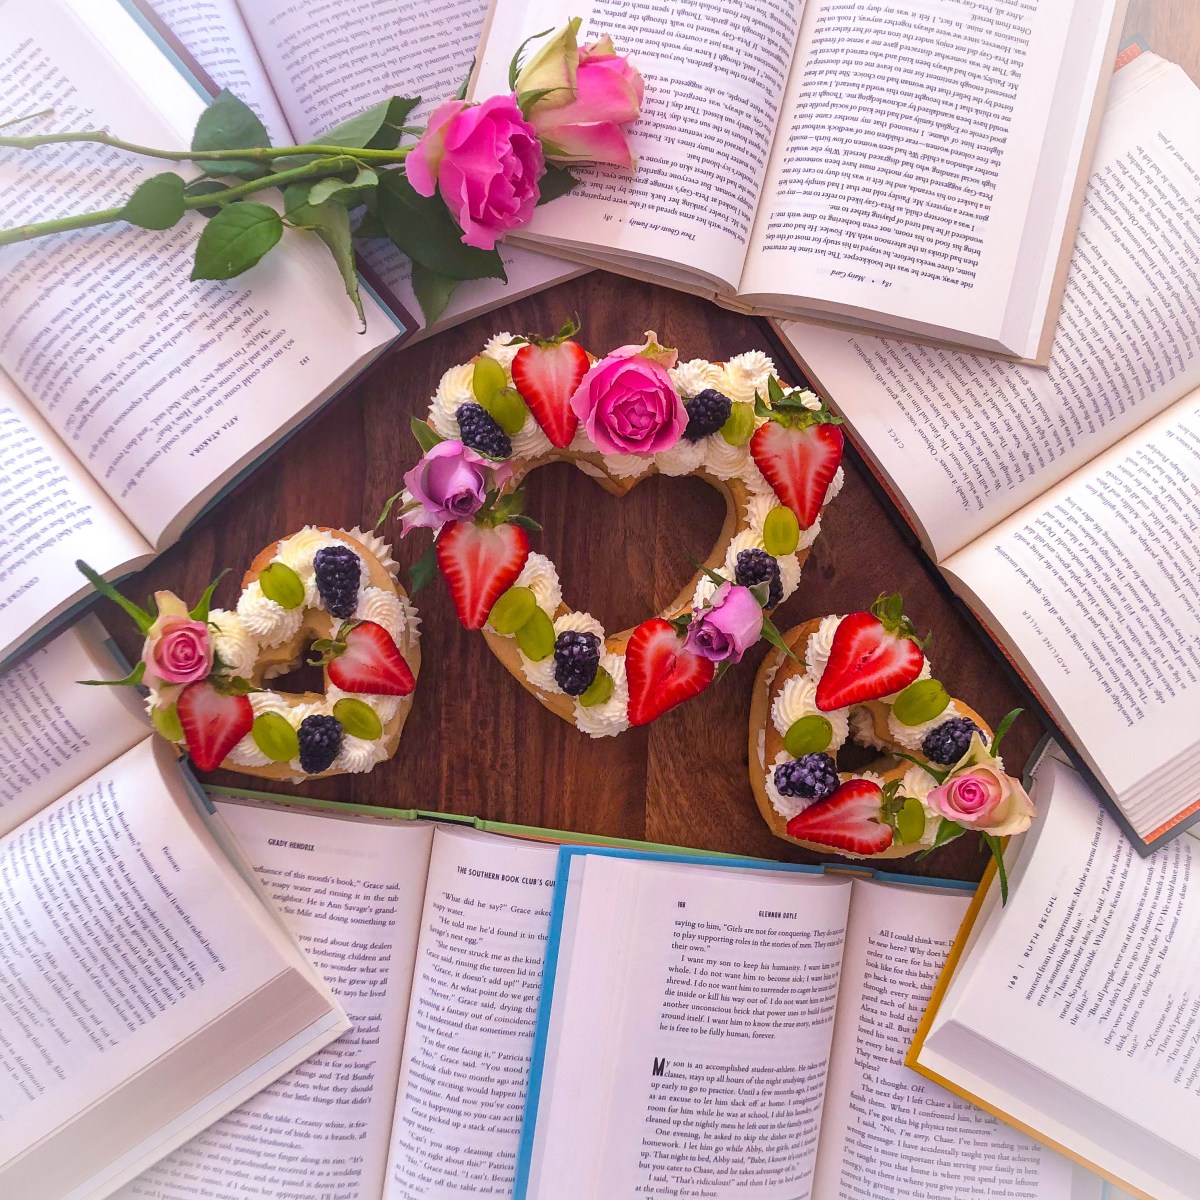
SO, to express my gratitude I need to do it in the only way I know how – baking you all something!! (I know I know that I’m technically going to be the one eating it but it’s for YOU, I assure you). here is an easy cake to say thank you!!! The base is essentially a big sugar cookie that you can cut into any shape, letter, or number that you’d like to – the key is to just have it open in the middle so you can admire the layers. The frosting is a very subtly sweet mascarpone frosting that is surprisingly sturdy enough to hold it all up!
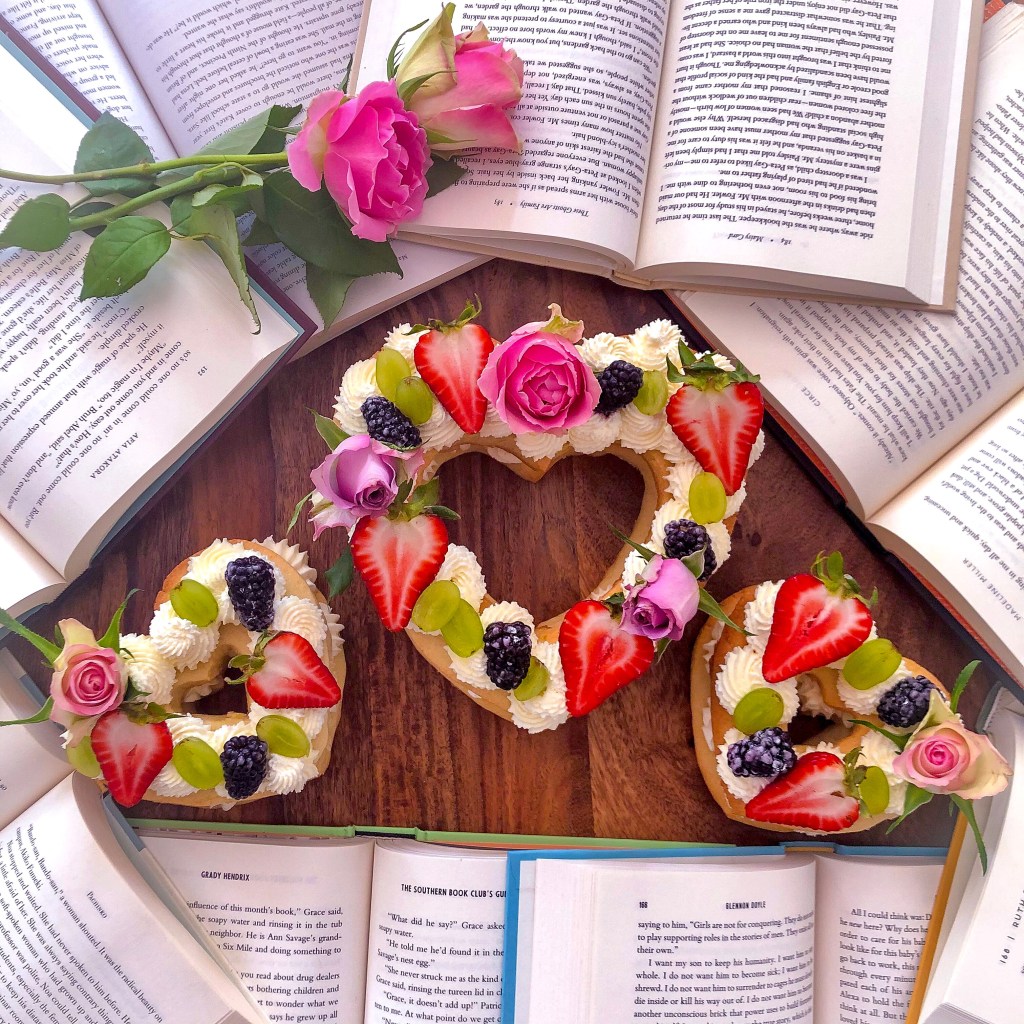
Heart Shaped Tart Cake
Cookie Base Recipe
- 4 sticks (two cups) of Salted Butter, softened
- 2 cups of granulated sugar
- 2 eggs, room temperature
- 2 tablespoons of vanilla extract
- 4 teaspoons of baking powder
- 6 cups of flour
Cookies How-To:
- Preheat your oven to 350 degrees. (Again, I forgot to do this. I don’t think I’ll ever remember!)
- Cream together your butter and sugar until completely integrated and fluffy, about 3 minutes at medium speed. ***Note – like I’ve mentioned before butter is a drama queen that demands to be respected. Softened butter should indent a bit when you touch it but shouldn’t be melted or liquidy. I just incorporate this step into my routine in the morning – put on the tea kettle, take out the butter from the fridge, do whatever else and then wait an hour or so until it’s ready for me.
- Scrape down your bowl and add your vanilla and your eggs, mix for about 30 seconds until combined.
- In a separate bowl measure out your six cups of flour, then add your baking soda and whisk to integrate.
- Mix in the flour into the butter mixture pulsating your mixer to juuust combine it to avoid over mixing. If you pour in all your flour at once you’ll have a mess on your hands, so do it in batches! 😉 Mix until you see the dough starts to come together. It should feel buttery and should stick together. If it’s a sandy texture continue to mix it a bit.
- Take your dough and separate it into double the amount of characters you want to create! For example, I did 3 hearts, so I separated my dough into SIX portions.
- Roll out each portion with your rolling pin on parchment paper, put whatever stencil your using over it and cut out your shape! I found my image on the internet doing a quick google search for printable stencils – a teacher’s secret trick for pretty bulletin boards :D.
- Use the parchment paper to help you transfer the cookie to a cookie sheet and back for 10-14 minutes (this will depend on how thick you rolled out your cookies). The edges should be golden brown.
Mascarpone Whipped Frosting
- 16 ounces of Mascarpone Cheese
- 2 cups of heavy cream
- 1/2 cup to 1 cup of powdered sugar (I used 1/2 a cup but this depends on how sweet you like your frosting!)
- 2 teaspoons of vanilla extract
Frosting How-To
- Through it all in the bowl of stand mixer with the whisk attachment. Whisk until it firms up and holds its peaks! This took about 2 minutes for me on high.
- Put into a piping bag and that’s it!
Assemble:
- Wait for your cookies to completely cool – this will happen quick!
- Take your base layer and pipe small swirls of your frosting onto the cookie.
- Top this with your second cookie and pipe on top again.
- Top with any fruits or edible flowers you wish! I used blackberries, strawberries, grapes. I recommend mint leaves as well!
